Welcome to our open-source project on image signal processor (ISP) pipeline known as Infinite-ISP.
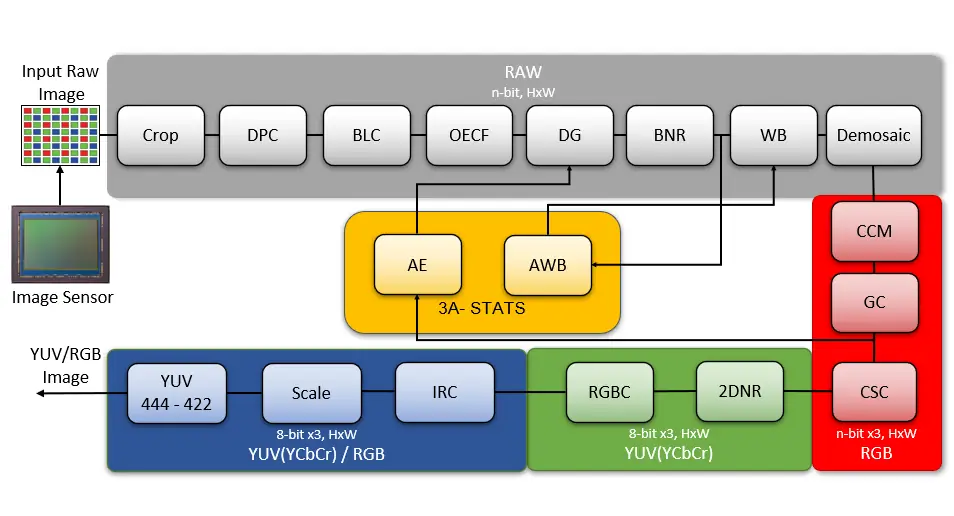
An Image Signal Processor (ISP) receives pixels from an image sensor, applies processing to the RAW sensor pixels and produces an output image that represents the scene close to what is perceived by the human eye. An ISP consists of several algorithm blocks pipelined together; each block applies a different kind of processing to the sensor pixels, step-by-step transforming the image sensor input into an output image for human perception.
Figure: Infinite-ISP Pipeline
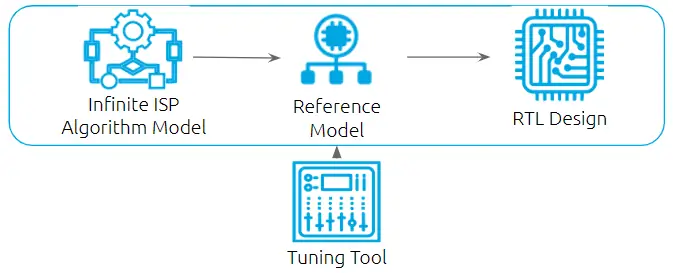
Infinite-ISP is a complete hardware ISP development ecosystem with publicly available floating-point and fixed-point pipeline models. The open-source nature enables rapid prototyping and development of ISP pipeline and its various algorithm blocks. Working on the Infinite-ISP fixed-point model (also called the ‘Reference Model’) enables the user to work on an industry-standard hardware Image Signal Processor. Once the fixed-point model of an algorithm (and subsequently the entire ISP pipeline) is written up to a certain standard, it can be converted into the equivalent hardware in Verilog / VHDL RTL.
Figure: Infinite-ISP, a hardware Image Signal Processor development ecosystem.
Infinite-ISP aims to cultivate a community of ISP developers who can freely design, experiment with and improve upon the ISP pipeline, adding more sophisticated processing and better algorithms to produce a cleaner, sharper and improved camera output. With Infinite-ISP, developers have the freedom to alter the order of the algorithm blocks and construct an ISP pipeline of their own in order to improve on the output image quality. This flexibility and liberty to tinker with a hardware ISP is a massive advantage for camera designers and engineers aiming to understand and work on an actual Image Signal Processor, as practical hardware ISP / Camera Pipelines in the industry are proprietary and closed-source (even the algorithms used in the ISP processing are closely guarded secrets!).
This tutorial series will navigate a new user through the ISP development process using Infinite-ISP. Let’s dive into our first tutorial, to get started with Infinite-ISP.
What you’ll learn
How to set up the Infinite-ISP repository
Infinite-ISP repository structure
How to process a ‘.raw’ file using Infinite-ISP pipeline object
Installation
Pre-Requisites
Before we start, ensure you have python installed on your computer and an active GitHub account. This tutorial recommends Python 3.9.12.
To clone the Infinite-ISP repository (repo) on your local computer, open your terminal and go to the directory where you want to place this cloned repo. Copy and paste the following command and press Enter.
Use the command below in your terminal to install all dependencies using pip.
pip install -r requirements.txt
fxpmath
matplotlib
numpy
PyYAML
rawpy
scipy
tqdm
Image Sensor Raw
The Infinite-ISP pipeline ‘Reference Model’ currently supports 8-bit, 10-bit, 12-bit and 14-bit per pixel, RAW sensor input for Bayer image sensors. The sensor pixel data is required in a ‘.raw’ file format without any header.
Getting Started
Once you have successfully set up the repo locally, you can start processing your raw data from an image sensor!
Repository Structure
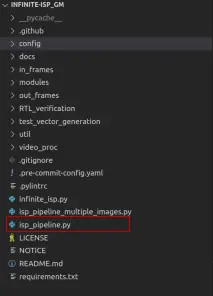
Open the cloned directory in a code editor of your choice (we recommend using VS Code). The contents of the cloned directory as viewed in the explorer tab are as follows:
Infinite-ISP directory with main file highlighted
isp_pipeline.py is the main file that uses the Infinite-ISP (defined in infinite_isp.py) object to generate a .png output file. All you have to provide is the ‘.raw’ file and a parameter configuration (config file). A config file is used to customize the ISP pipeline behavior by setting preferences and to separate configuration details from code, enhancing flexibility and maintainability of the project. For convenience, some sample raw files are also provided in the ./in_frames directory and a default config file can be found in the ./config directory. Refer to the upcoming tutorials for details on the remaining folders in the main directory.
The config file allows the user to set the parameters of ISP pipeline blocks. The user can change the parameter of each block to alter the pixel processing. This is helpful in tuning the pipeline blocks to achieve a desired effect to the output image.
Processing a single Image Sensor RAW through Infinite-ISP
Let’s start with processing a single raw file using the default configuration of the Infinite-ISP pipeline. In order to process a single image sensor RAW image (.raw file) through Infinite-ISP pipeline, we need to do the following:
1. Setup ‘isp_pipeline.py’
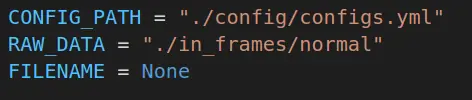
Open the isp_pipeline.py file and set the three path parameters:
Isp_pipeline.py script
You can see that the parameter ‘FILENAME’ is set to ‘None’. This is because the ‘FILENAME’ is an optional parameter in this file.we will be setting the filename in the default config file present in the ./config directory.
2. Setup ‘configs.yml’
The ‘configs.yml’ is a configuration file, which contains the ISP parameters for the Infinite-ISP pipeline. The Infinite-ISP pipeline is initialized based on the parameters set in the configuration file. It also contains information about the image sensor RAW, such as pixel bit-depth, image dimensions and the Bayer pattern. We will discuss various sections of this file in later tutorials.
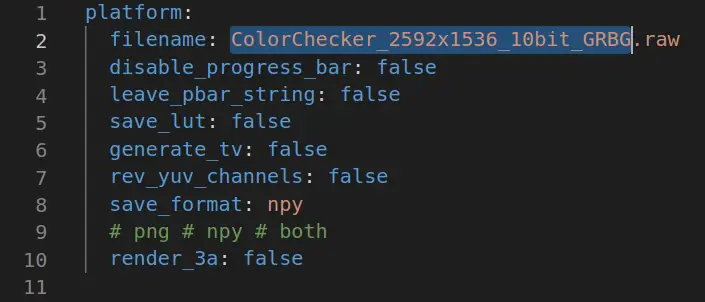
For this tutorial, we limit our scope on the Infinite-ISP configuration file. We will use the ‘ColorChecker_2592x1536_10bit_GRBG.raw’ image sensor Bayer RAW file from the ./in_frame/normal directory and the default config file present in the ./config directory of our repository. Providing the filename in the config file under the platform heading or in the isp_pipeline.py file is your choice. As we set the filename in the configs.yml file, we are good to go!
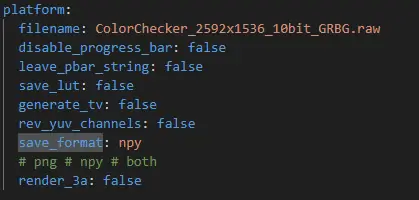
Default config file
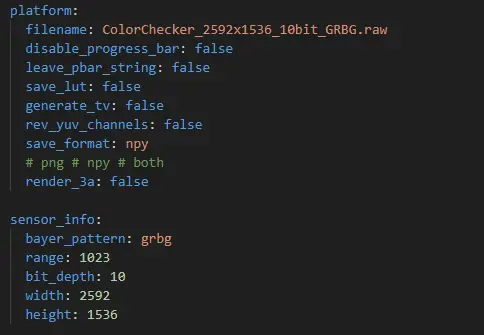
The ‘ColorChecker_2592x1536_10bit_GRBG.raw’ is an image sensor Bayer RAW that has 10-bit per pixel, GRBG Bayer pattern and a dimension of 2592 x 1536 pixels. For Infinite-ISP to correctly read and process the image sensor RAW, it is essential to configure these characteristics in the configs.yml file. These can be configured in the ‘sensor-info:’ section as follows:
For the sake of this tutorial, the fields ‘bayer_pattern’, ‘bit_depth’, ‘width’ and ‘height’ are already set to their correct values for the ‘ColorChecker_2592x1536_10bit_GRBG.raw’ file by default.
3. Run ‘isp_pipeline.py’
We can now run the Infinite-ISP pipeline to process the image sensor RAW input ‘ColorChecker_2592x1536_10bit_GRBG.raw’ with the ISP configuration ‘configs.yml’.
Use the following command on the terminal or run the isp_pipeline file in your code editor:
python isp_pipeline.python
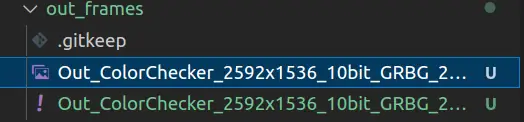
Executing the pipeline generates a .png output file that is placed in the ./out_frames folder along with a copy of the configuration file through which it was processed and produced:
./out_frames directory
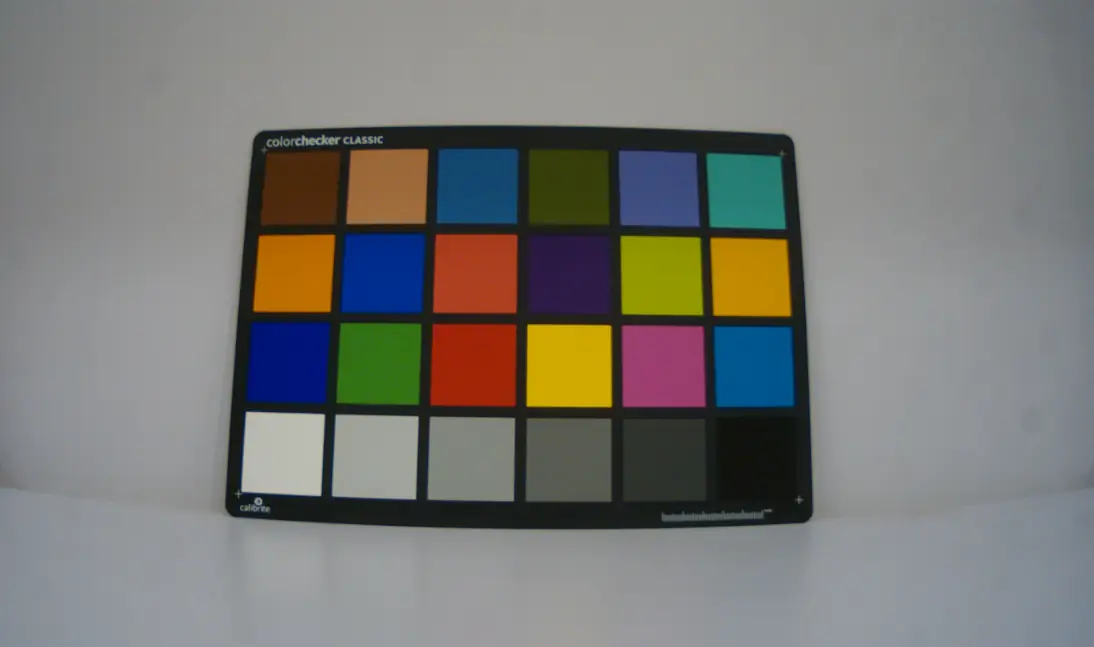
Infinite-ISP Pipeline output
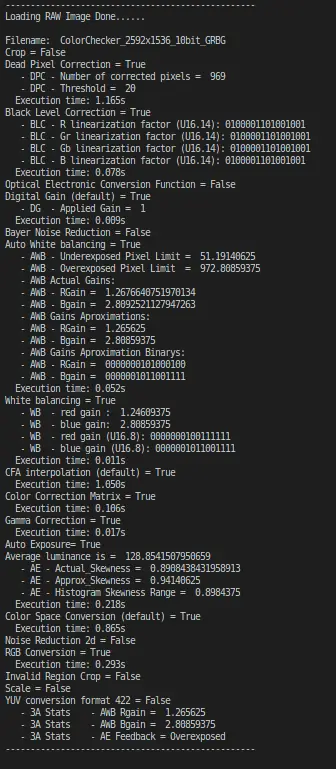
ISP Pipeline Execution Log
Logs are also printed in the terminal briefly outlining the sequence of execution of the 18 ISP modules, their parameter configuration and the time taken to process the image as shown in the image below.
Terminal Logs
The detailed description of algorithms and parameters for each ISP block can be found in the docs directory and README.md file.
Using a different Image Sensor RAW with Infinite-ISP
To input a different .raw file into the Infinite-ISP pipeline and process it with the same configuration as set in configs.yml, set the FILENAME parameter in the isp_pipeline.py file.
Changing the FILENAME parameter in isp_pipeline.py
Using your own Image Sensor RAW
You can also use the Infinite-ISP to process an Image Sensor RAW of your own. You just need to follow the above explained steps:
Setup isp_pipeline.py
Setup configs.yml
Run isp_pipeline.py
Using your own Image Sensor RAW, you might need to update the ‘sensor_info:’ section of the configs.yml file. The pipeline output may not have accurate color tone reproduction of the captured scene. For accurate color reproduction, you may need to tune the Infinite-ISP color processing blocks for the image sensor. More on ‘Tuning the Infinite-ISP’ in later tutorials.
Tapping outputs from within the ISP Pipeline
Infinite-ISP allows you to not just save and view the overall ISP processing pipeline output, but also enables you to observe and tap the outputs from any ISP block. This feature can help users understand the kind of processing applied independently on the image sensor RAW by each ISP block. It also helps the users to map the journey of successive transformation of the image sensor RAW to a complete photo-finished output through the different blocks of the ISP pipeline.
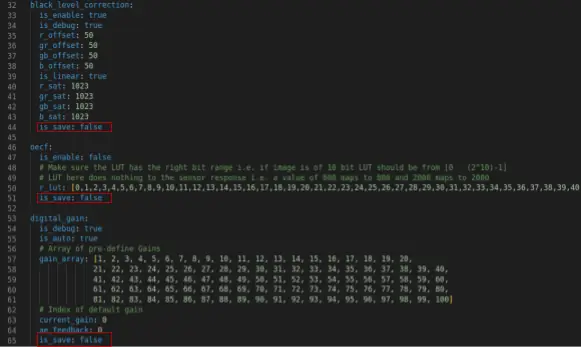
In order to save the output of a particular block of the ISP pipeline, the is_save flag needs to be set to ‘true’ for the respective ISP block in the configs.yml file.
is_save flag is defined for each ISP block
These results can be saved as .npy or .png files. The save format can be configured in the config file via the ‘save_format’ parameter under the platform section:
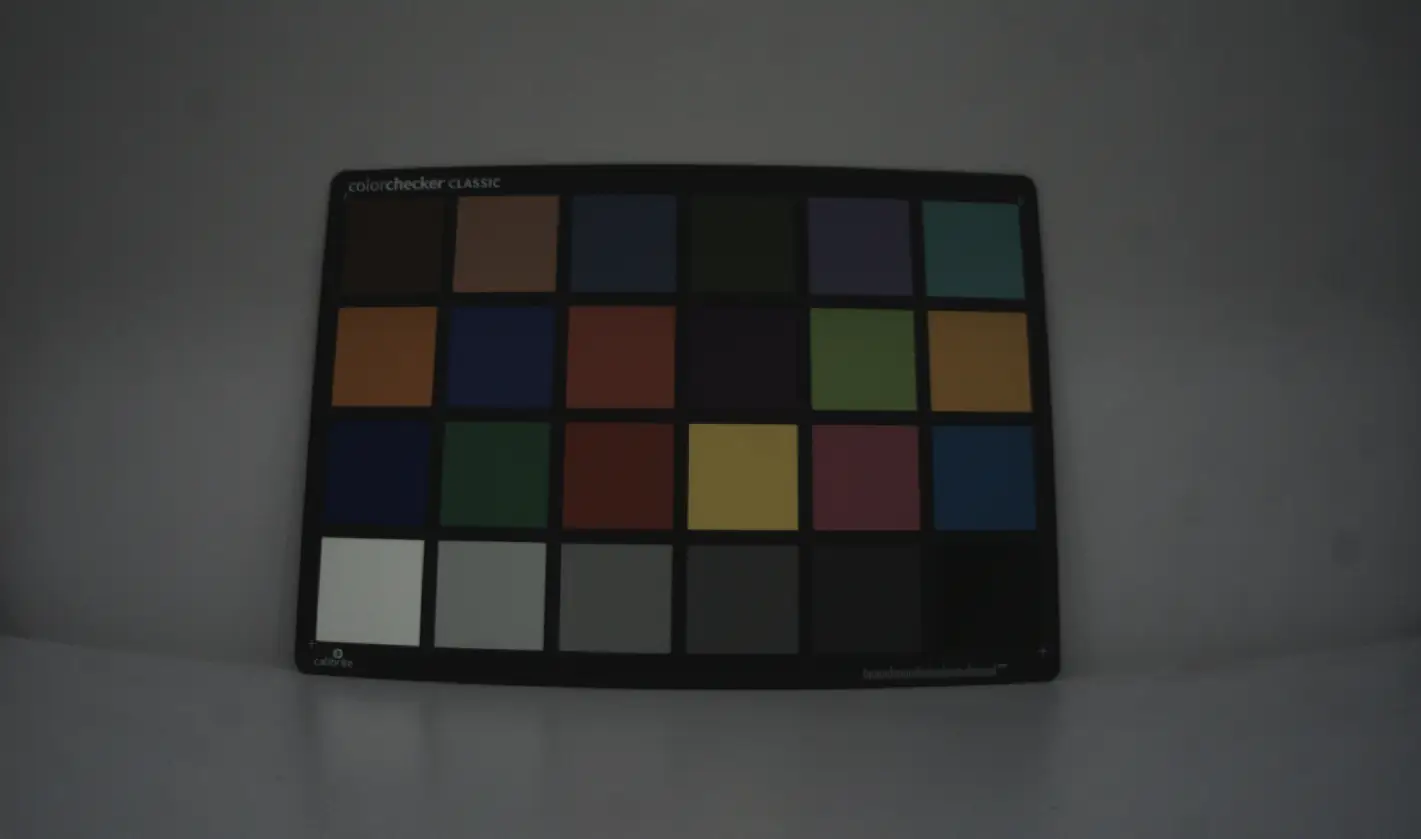
The image shown below, for example, is the output of the demosaic block. The ISP block outputs can be accessed in the ./test_vector/Results directory, which is created on run time.
Output of the demosaic module with all previous modules enabled.
Table of Contents
Get Your Free Consultation Now! Discover how our expertise can elevate your project